In the latest updates of Microsoft Dynamics 365 Business Central, you can now store pictures for Item Variants, making it easier to visually differentiate product options such as color, size, or style.
This enhancement improves usability for sales teams, warehouse staff, and product managers by allowing quick identification of product variations directly from the system.
Why This Feature is Useful
Many companies manage products with multiple variants, for example:
T-shirts with different colors
Jewelry with different metal types
Shoes with different sizes
Previously, variants were identified mainly through codes or descriptions. Now you can attach variant-specific images, making it easier to visually confirm the correct option.
Example:
Item
Variant
Image
Ring
Gold
Gold ring image
Ring
Silver
Silver ring image
This helps reduce order errors and improves product clarity.
How to Add a Picture to an Item Variant
Follow these steps to attach an image to a variant.
1. Open the Item Card
Navigate to the Item Card of the product.
2. Open Variants
Choose the Variants action to view the list of item variants.
3. Select a Variant
Select the variant you want to update and open the Item Variant Card.
4. Add or Manage the Image
On the Picture FactBox, choose one of the following actions:
Where This Feature Helps Most
This feature is particularly valuable in industries with visually distinct variants:
Retail
Fashion
Jewelry
Manufacturing
E-commerce integrations
Warehouse staff can quickly verify the correct variant during picking and packing, reducing mistakes.
Practical Example
Suppose you sell a Bracelet with multiple color options.
Variant Code
Description
Image
BR-GLD
Gold Bracelet
Gold image
BR-SLV
Silver Bracelet
Silver image
BR-BLK
Black Bracelet
Black image
By attaching pictures, users can instantly confirm they are selecting the correct variant.
Summary
The Item Variant Picture feature in Microsoft Dynamics 365 Business Central enhances product management by:
Allowing images for each variant
Improving visual identification
Reducing selection errors
Enhancing user experience
This is a small but powerful improvement that helps organizations manage complex product catalogs more efficiently.
Every major release of Microsoft Dynamics 365 Business Central introduces improvements that impact how developers design, build, and maintain extensions.
Version 28 (2026 Release Wave 1) focuses strongly on performance optimization, platform modernization, and improved developer productivity.
For developers building extensions using AL and Visual Studio Code, several changes require attention during upgrades.
In this article, I will walk through the Top 10 developer changes in Business Central v28 and what they mean for your extensions.
1. Legacy Pricing Engine Removed
One of the biggest platform changes in v28 is the complete removal of the legacy pricing engine.
Microsoft introduced the new Price List architecture in earlier versions, and now it becomes the only supported pricing model.
Developer Impact
Extensions relying on older pricing logic must migrate.
Areas to review include:
custom price calculations
discount logic
pricing-related code units
integrations referencing legacy pricing tables
The new pricing system provides a more flexible framework for managing pricing rules and discounts.
2. FlowField Calculation Optimization
Business Central v28 introduces an important optimization for FlowField calculations.
Previously, FlowFields could be calculated even if they were not visible on the page.
In v28, FlowFields are calculated only when the field is visible in the UI.
Benefits
fewer SQL queries
faster page loading
improved scalability for large datasets
3. Improved Search Metadata
Search and navigation are significantly improved in v28.
Developers can now provide better search metadata that improves how users discover pages, actions, and data.
Why this matters
In large Business Central environments with hundreds of pages and reports, improved search helps users locate functionality much faster.
Developers should review:
page captions
action captions
field descriptions
Clear naming improves search results and usability.
4. Resource Files in Extensions
Another useful improvement in v28 is the ability to include resource files within extensions.
These files can store:
configuration data
templates
initialization data
Benefits
Developers can package configuration data directly with the extension instead of writing complex installation code.
This simplifies deployment and improves maintainability.
5. Profile Extension Objects
Customizing user profiles previously required copying base profiles, which created upgrade issues.
Business Central v28 introduces profile extension objects, allowing developers to extend profiles without duplication.
Advantages
cleaner customization model
easier upgrades
better maintainability
Developers can now modify Role Centers and user experiences in a more structured way.
6. Improved Performance Profiling
Performance troubleshooting becomes easier with new profiling improvements.
Developers can capture performance data to analyze:
long-running AL procedures
page load times
inefficient database queries
Why this matters
In large implementations with many extensions, performance bottlenecks can be difficult to detect.
Profiling tools help developers identify inefficient code earlier.
7. SQL Telemetry Insights
Business Central v28 provides better telemetry insights for database operations.
Telemetry data includes:
SQL query execution time
table interactions
query performance statistics
This information integrates with Microsoft Azure Application Insights.
Developer Advantage
Developers can monitor real production workloads and optimize extensions based on actual usage patterns.
8. Sandbox Upgrade Testing Improvements
Upgrade testing is easier in v28.
Developers can now upgrade existing sandbox environments to preview versions.
Benefits
test extension compatibility earlier
simulate production upgrades
reduce upgrade risks
This is particularly important for partners maintaining multiple customer environments.
9. AI Agent Development Scenarios
Microsoft continues to move toward AI-assisted development workflows.
New tools and integrations enable AI agents to assist developers in tasks such as:
analyzing AL code
generating documentation
improving developer productivity
This aligns with Microsoft’s broader AI strategy across the Dynamics ecosystem.
10. Enhanced VS Code Development Experience
The development experience in Visual Studio Code continues to improve.
Enhancements include:
better debugging capabilities
improved symbol downloads
smoother Git integration
improved navigation in large AL projects
These improvements help developers manage complex extension projects more efficiently.
What Developers Should Prepare for in v28
Before upgrading to Business Central v28, developers should review their extensions carefully.
Key areas to validate include:
pricing logic compatibility
FlowField calculations
performance-sensitive code
search metadata
extension initialization processes
Testing extensions in sandbox environments before production upgrades is strongly recommended.
Business Central v28 continues Microsoft’s focus on modernizing the platform and improving developer productivity.
The most significant changes for developers include:
removal of legacy pricing logic
optimized FlowField calculations
improved telemetry and profiling tools
better development workflows in Visual Studio Code
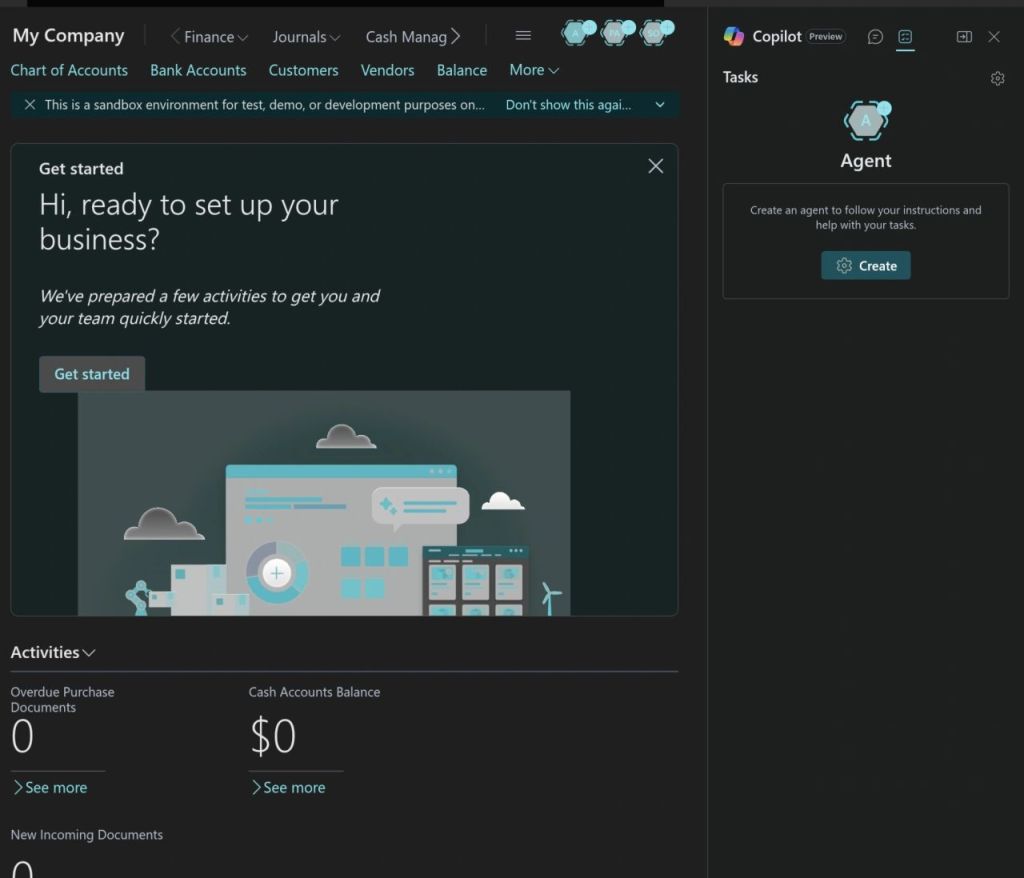
Artificial Intelligence is rapidly expanding inside enterprise systems. With Microsoft Dynamics 365 Business Central v27.4, Microsoft now exposes a first-class agent creation capability — allowing you to define, configure, and run intelligent agents directly inside your ERP environment.
In this blog, we’ll walk through how agents work, the creation experience based on what’s available in the product today.
🚀 What Are AI Agents in Business Central?
In Business Central, AI agents are software assistants that can:
Understand natural language instructions
Execute business tasks against Business Central data
Follow configured rules and permissions
Operate autonomously or with human review
These agents sit at a higher abstraction layer than traditional workflows — they interpret intent and then coordinate actions across standard Business Central APIs, pages, and logic.
🛠 Step-by-Step: Creating an Agent in Business Central
Here’s a distilled implementation walk-through based on the video and documentation:
1. Enable Agent Capabilities
Before you can create agents, you must:
Enable Custom Agent capability in your Business Central environment
Have a sandbox tenant for experimentation
Ensure you have relevant permission sets such as AGENT-ADMIN and AGENT-DIAGNOSTICS applied to your user account
2. Start the Agent Wizard
Once enabled:
Click the “Agent” icon in the role centre
Choose Create New Agent
Select a template (e.g., Sales Validation) or start from scratch
Provide:
The installer guides you through setting up:
Purpose
Profile
Permissions
Agents are treated like users, so they must have clear permissions defining what Business Central data they can access and act on.
3. Define Agent Instructions
This is the heart of the agent. Instructions are plain-language “task definitions” that guide what the agent should do when triggered.
A basic instruction structure looks like:
Introductory purpose
Step-by-step tasks
Expected output or result
Example :
“You are a Business Central agent. When invoked, check all overdue receivables and create a work list of customers where the balance exceeds credit terms.”
Agents use this instruction to orchestrate actions, call APIs, or run logic — all while respecting security.
4. Configure Execution Profile
Each agent runs under a specific profile:
Choose standard or custom roles used in Business Central
Profiles determine UI access and actions available to the agent
Permissions are tied to the profile
Profiles limit what the agent can read or write — essential for governance.
5. Test and Activate
Once configured:
Use the Agent Task Playground to simulate tasks
Review output and refine instructions
When ready, activate the agent
The agent can run immediately or wait for a trigger
In preview today, scheduling and automated triggers are limited — most agents are started manually or via designated events.
📍 Real Business Examples
Agents being highlighted in Business Central include:
🔹 Sales Order Agent
Monitors a designated email inbox
Parses incoming customer requests
Locates or creates the customer record
Verifies item availability
Generates and sends quotes or orders via email
Keeps the human reviewer in the loop for approvals and changes
This helps sales teams minimize manual order entry by automating standard order processing tasks.
🔹 Payables & AP Agents
Similar to sales agents, agents can automate Accounts Payable workflows by:
Monitoring invoice email inboxes
Extracting invoice data using AI
Drafting vendor invoices inside Business Central
Letting users review and finalize postings
This frees AP teams from repetitive data entry and improves efficiency.
AI agents in Microsoft Dynamics 365 Business Central are more than an experiment — they’re a new paradigm for embedding intelligence inside operational ERP processes. Rather than writing bespoke automation, you define business intent, and the system interprets and operationalizes it — provided you set the rules, permissions, and expectations correctly.
I recently attended AgentCon Bangkok 2026, and one theme was unmistakable: AI agents are transitioning from experimental prototypes to enterprise-grade systems.
The narrative has shifted.
It is no longer about building impressive demos. It is about designing structured, governed, production-ready agent architectures that can operate inside real business systems.
1. The Evolution of AI Agents
In earlier stages, most AI implementations focused on:
Prompt engineering
Single-agent task execution
Standalone copilots
At AgentCon, the conversation was centered on:
Multi-Agent Architectures
Planner–Executor–Validator models are becoming standard design patterns. Instead of a single LLM handling everything, responsibilities are separated:
Planner agent defines tasks
Executor agent performs tool calls or API interactions
Validator agent enforces constraints and accuracy
This improves determinism, auditability, and risk control.
2. Tool-Calling Is the Real Differentiator
What makes agents enterprise-ready is not the language model itself — it is structured tool integration.
In ERP ecosystems like Microsoft Dynamics 365 Business Central, value emerges when agents:
Call APIs securely
Read structured financial data
Trigger workflows
Generate reports with contextual awareness
The LLM becomes a reasoning layer, while the ERP remains the system of record.
This separation is critical.
3. Practical Enterprise Applications
Beyond experimentation, AI agents are beginning to demonstrate measurable operational value across industries:
Configuration & Compliance Audits
Agents that scan enterprise configurations, policy settings, and control structures — identifying inconsistencies and generating structured compliance reports.
Automated Documentation & Knowledge Systems
Agents that analyze system metadata, logs, or workflows to generate accurate, up-to-date documentation and operational guides.
AI-Assisted Development & Code Review
Agents embedded into IDEs to:
Review code quality
Validate security standards
Detect performance bottlenecks
Enforce architectural guidelines
Intelligent Workflow Orchestration
Agents embedded within operational processes to:
Provide contextual recommendations
Validate transactions before execution
Surface risk indicators in real time
Assist decision-makers without bypassing control layers
The emphasis is augmentation — not blind automation.
4. The Real Question
The future is not about replacing users.
It is about designing human-in-the-loop systems where:
Agents reason
Humans approve
Systems enforce
The architectural discipline behind these systems will determine whether AI becomes operational infrastructure — or remains a demo tool.
Final Thoughts
AgentCon reinforced a clear conclusion:
AI capability is accelerating. Enterprise readiness depends on architecture.
Organizations that invest in governance models, tool integration frameworks, and structured orchestration will lead the next phase of AI adoption.
If you are building production-grade agent systems inside enterprise environments, this is the moment to think beyond prompts — and design for scale.
The world of Business Central development is evolving rapidly—and one of the most powerful accelerators in recent years is Copilot. With AI deeply integrated into the Microsoft ecosystem, developers building extensions with AL now have an intelligent partner that speeds up development, enhances accuracy, and improves productivity.
🧠 What Is Copilot in Business Central?
Copilot is Microsoft’s AI-powered assistant designed to help developers, consultants, and end-users across Dynamics 365. For Business Central development, Copilot works in multiple ways:
It acts like a smart co-developer—always ready, always fast.
💻 Copilot Inside AL Development (VS Code Integration)
To leverage Copilot for AL development, developers use the GitHub Copilot extension in Visual Studio Code. This integration enables:
✔ Instant AL Code Generation
Developers can write a comment or a simple description, and Copilot generates the AL code structure automatically.
Example:
// Create a sales quote scheduler job that sends reminders
Copilot produces the full codeunit, job logic, and scheduling pattern.
✔ Faster Page & Table Extensions
Copilot instantly creates field additions, actions, triggers, and layouts without manual typing.
✔ API & Permission Set Generation
Perfect for rapid prototyping.
🤖 Using AI Inside AL Extensions
You can integrate AI into your custom extensions using Copilot-enabled system codeunits or external AI services.
Example: A simple AI-driven item description generator:
codeunit 50100 "Item AI Description"
{
    procedure Generate(ItemRec: Record Item): Text
    var
        Copilot: Codeunit "Copilot System";
    begin
        exit(
            Copilot.GenerateText(
                'Create a professional marketing description for item: ' + ItemRec.Description
            )
        );
    end;
}
This allows users to generate product descriptions instantly saving hours of manual work.
⚡ How Copilot Improves AL Developer Productivity
🟦 1. Rapid Coding
Copilot reduces 60–70% of repetitive development effort.
🟦 2. Fewer Syntax Errors
Copilot understands AL structures and suggests correct patterns.
🟦 3. Code Understanding
It can analyze and explain legacy AL code—very useful during upgrades from NAV to BC.
🟦 4. Documentation
Automatically generates comments and XML documentation.
🟦 5. Code Quality
Copilot suggests modern patterns like interfaces, single-responsibility design, and event-driven architecture.
🚨 Limitations—What Developers Should Know
Despite its strengths, Copilot is not perfect:
It may generate outdated syntax or patterns.
It cannot validate AL compiler rules.
It sometimes repeats code blocks unnecessarily.
Developers must always review and refactor generated output.
Copilot is a booster, not a replacement for AL expertise.
Copilot is not just a trend—it’s a game changer for Business Central developers. It speeds up AL development, supports learning, and enhances overall code quality. By embracing Copilot, organizations can deliver extensions faster, reduce development cost, and empower developers to focus on business logic rather than repetitive tasks.
The future of Business Central development is AI-assisted, and Copilot is leading the way.
When working with barcode printing in RDLC reports on Microsoft Dynamics 365 Business Central On-Premise, I recently ran into an issue that had me stumped for hours — and as it turns out, it all came down to a subtle but critical font installation step.
If you’re using Business Central and your barcodes refuse to show up in your reports (even after installing the right fonts), read on — this might just be your solution.
🚫 The Problem: Barcode Fonts Not Showing in RDLC
Here’s what I tried — the standard advice you’ll find across most forums:
✅ Installed the barcode font (Code 128, Code 39, Free 3 of 9, etc.) on the service tier machine
✅ Installed the same font on the user/client machine
✅ Restarted the Business Central Server/NST
✅ Restarted the entire machine
✅ Checked that RDLC reports were using the correct font name
Still — no barcodes were rendered.
🕵️ The Hidden Detail: “Install for All Users”
After much trial and error, I stumbled across the real fix:
When installing a font on the Business Central service tier (server), you must choose “Install for all users” — not just a regular install.
Here’s why:
Business Central’s NST runs under a system account, not your logged-in user.
Fonts installed only for the current user aren’t visible to the NST process.
Unless the font is registered system-wide, RDLC won’t be able to use it.
Install the Barcode Font on the Server
Right-click the font file (e.g., Code128.ttf)
Choose ➡️ Install for all users
Install the Font on Client Machine (Optional but recommended)
This ensures previews and printed reports render properly when opened locally.
Restart the Server
Not just the NST service — a full restart helps Windows fully register system fonts.
It’s always the little things! A simple checkbox — “Install for all users” — was all it took to fix what seemed like a mysterious RDLC issue.
If you’re working with barcode fonts in RDLC reports on Business Central and nothing seems to work, double-check your font installation method — this could save you hours of frustration.
When building customizations or integrations in Microsoft Dynamics 365 Business Central, performance is often a key concern—especially when working with large datasets. One powerful tool for improving performance is the SETLOADFIELDS method on record variables.
🚀 What is SETLOADFIELDS?
In Business Central, when you retrieve a record (using FIND, GET, NEXT, etc.), all fields of the record are loaded from the database by default. This includes fields you might never use, such as FlowFields (which are calculated on the fly). This can lead to unnecessary memory usage and slower data retrieval.
SETLOADFIELDS tells the system which fields to load, so it skips the rest. This can dramatically improve performance, particularly when:
You’re looping through large datasets
You’re only using a few fields per record
Your table includes FlowFields or BLOBs
📘 Syntax
Rec.SETLOADFIELDS(Field1, Field2, ...);
You place this line before reading the records. This tells the AL runtime engine to load only the specified fields when the records are retrieved.
Let’s say you need to loop through all items and check their No. and Inventory:
Item.SETLOADFIELDS("No.", Inventory);
if Item.FINDFIRST then
  repeat
    if Item.Inventory > 0 then
      // do something
  until Item.NEXT = 0;
Use SETLOADFIELDS only when needed – Overusing it without understanding the data flow may result in missing fields or unexpected behavior.
Calling CALCFIELDS still works – You can still explicitly calculate FlowFields after using SETLOADFIELDS.
Resets on modification – If you call MODIFY, INSERT, or VALIDATE, the load fields context is reset. Use SETLOADFIELDS again if necessary.
BLOB and FlowFields – Avoid loading BLOBs and FlowFields unless absolutely necessary. SETLOADFIELDS helps you skip them efficiently.
👨💻 Summary
Feature
Without SETLOADFIELDS
With SETLOADFIELDS
Data Loaded
All fields
Only specified fields
Memory Usage
High
Lower
Speed
Slower
Faster
By leveraging SETLOADFIELDS, developers can significantly optimize the performance of their AL code in Business Central. It’s a small addition that can make a big difference in speed and scalability.
Avoid it when doing full record operations like MODIFY, unless you’re confident about which fields are required.
In today’s fast-paced business environments, performance optimization is not a luxury — it’s a necessity. Whether you’re building custom reports, extending pages, or writing integration APIs in Microsoft Dynamics 365 Business Central, slow operations can frustrate users and strain resources.
One simple but powerful technique to improve performance is using the SetAutoCalcFields method.
Why FlowFields Matter for Performance
In Business Central, FlowFields are virtual fields calculated on the fly, not stored physically in the database. Examples include:
Inventory on Item
Balance on Customer
When you retrieve a record, FlowFields are not calculated automatically unless you explicitly call CalcFields().
Manually calculating FlowFields for every record during loops, leading to multiple SQL queries — one for each record — causing heavy load and slower performance.
SetAutoCalcFields solves this by batch-calculating FlowFields along with the record fetch. Instead of running one query per record, it combines the calculation in a single optimized query.
Imagine fetching 1,000 customers and displaying their balances without SetAutoCalcfields:
CustomerRec.FindSet();
repeat
    CustomerRec.CalcFields(CustomerRec.Balance); // Triggers a DB call every time!
    DisplayBalance(CustomerRec."No.", CustomerRec.Balance);
until CustomerRec.Next() = 0;

Result:
1 SQL query to get Customers
+ 1,000 SQL queries for Balances
With SetAutoCalcFields:
CustomerRec.SetAutoCalcFields(CustomerRec.Balance);
CustomerRec.FindSet();
repeat
    DisplayBalance(CustomerRec."No.", CustomerRec.Balance);
until CustomerRec.Next() = 0;

Result:
1 SQL query to get Customers and Balances together
Benefits of Using SetAutoCalcFields
Improved Page Load Times: By deferring calculations, pages with numerous records and calculated fields will load significantly faster.
Faster Report Generation: Reports that rely on calculated fields will be generated more quickly as the calculations are performed only when the field’s value is actually needed for display or processing.
Reduced Database Load: Fewer automatic calculations translate to fewer database queries, reducing the overall load on your Business Central database.
Enhanced User Experience: Snappier performance leads to a more responsive and enjoyable user experience.
Best Practices for Performance Gains
To maximize the benefits of SetAutoCalcFields:
Only specify necessary FlowFields: Don’t auto-calculate every FlowField — focus on what your process needs.
Use it before data retrieval: Call SetAutoCalcFields beforeFindSet(), FindFirst(), or FindLast()
Avoid unnecessary recalculations: Once FlowFields are set to auto-calculate, do not manually call CalcFields() again for the same fields.
Monitor heavy FlowFields: Some FlowFields (e.g., Inventory) involve complex sums across tables — only auto-calculate when really needed.
Profile your code: Use Performance Profiler to measure improvements.
Using SetAutoCalcFieldsproperly can lead to dramatic performance improvements in Business Central. By reducing SQL traffic, simplifying code, and batch-fetching FlowFields intelligently, you can create faster, cleaner, and more scalable applications.
A small change in your coding habits can create a big impact for your users.
Microsoft Dynamics 365 Business Central 2025 Wave 1 continues to improve its developer experience with handy new features. One of the exciting additions in this release is the File.ViewFromStream method — a simple yet powerful function that enhances how developers interact with files stored in memory.
In the current versions of Business Central, when you need to view an attached document, a report output, or an incoming file, the typical process involves downloading the file first and then opening it with an external application. This can be time-consuming, especially when dealing with multiple files or when you simply need a quick glance at the content. Switching between applications disrupts your workflow and can feel inefficient.
📘 What is File.ViewFromStream?
The new method File.ViewFromStream(Stream: InStream,Text[,Boolean]) enables developers to open or preview a file directly from a stream, without having to save it to a temporary physical file.
This is a major convenience when working with files generated on the fly — such as PDFs, Excel files, or text reports — especially in scenarios where users just need to view or download the file rather than save it on the server.
Syntax
[Ok := ] File.ViewFromStream(InStream: InStream, FileName: Text [, AllowDownloadAndPrint: Boolean])
🛠 Example:
procedure ShowGeneratedReport()
var
    TempBlob: Codeunit "Temp Blob";
    OutStream: OutStream;
    InStream: InStream;
    ReportContent: Text;
begin
    ReportContent := 'Hello from AL!' + Format(CurrentDateTime) + '\nThis is a preview of your text report.';

    TempBlob.CreateOutStream(OutStream);
    OutStream.WriteText(ReportContent);

    TempBlob.CreateInStream(InStream);
    File.ViewFromStream(InStream, 'ReportPreview.txt', true);
end;
💼 Use Cases
Here are some scenarios where ViewFromStream can be a game-changer:
Previewing customer invoices or sales reports generated on-demand.
Opening files attached in workflow approvals.
On-the-fly document generation in extensions or apps.
The File.ViewFromStream method offers a powerful and user-friendly way to present stream content directly within Dynamics 365 Business Central. TheFile.ViewFromStream method is a lightweight, client-friendly way to present text content on the fly in Business Central.
Introduced in Business Central Wave 1 2025 releases, the SessionInformation.Callstack() method is a powerful diagnostic tool that helps developers trace the current call stack within AL code. Whether you’re troubleshooting custom extensions, tracking errors, or building telemetry, this method can become your best friend.
What is the SessionInformation.Callstack() Method?
The SessionInformation.Callstack() method is a built-in function in AL that returns a text string representing the current call stack of the Business Central server session. Think of the call stack as a chronological list of the functions and procedures that have been called to reach the current point in your code.
Each entry in the call stack typically includes:
Object Type and Name: The type of object (e.g., Codeunit, Table, Page) and its name.
Function/Procedure Name: The specific function or procedure being executed.
Line Number: The line number within the function/procedure where the call originated.
📌 Syntax
var
    CallStackText: Text;
begin
    CallStackText := SessionInformation.Callstack();
end;
🧩 Why is the Call Stack Important?
Understanding the call stack is crucial for several reasons:
Debugging: When an error occurs, the call stack provides a trace of the execution path leading up to the error. This helps you pinpoint the exact location where the issue originated and understand the sequence of events that triggered it.
Error Handling: By capturing and logging the call stack when an error occurs, you can provide more context to administrators or support teams, making it easier to diagnose and resolve issues.
Code Understanding: Analyzing the call stack can help you understand the flow of execution in complex codebases, especially when working with unfamiliar code or trying to understand how different modules interact.
You can combine this with
ErrorInfo object (for AL error handling)
SessionInformation.UserId() or CompanyName() for full diagnostic logs
var
    CallStack: Text;
    ErrorData: ErrorInfo;
begin
    if not TryMyFunction() then begin
        GetLastError(ErrorData);
        LogToTable('Error: %1 - Stack: %2', ErrorData.Message, SessionInformation.Callstack());
    end;
SessionInformation.Callstack() is a small method with big potential. It’s the AL developer’s X-ray — revealing the path of execution in complex customizations or tangled logic.