 Though we are eagerly waiting for October 2018 Business central on-premise version and meanwhile we have news that Codeunit 1 (Application Management ) has been retired and new system events has been introduced in 2 billion range.
This has been refactor to cope up with new development environment .so henceforth you will not find Codeunit 1 in object designer.
Whenever database is created these special codeunits will be created automatically. As well as they will not contain event instead of code.
Following functions become events
Codeunit 1 function name |
New Object Type |
New Object ID |
New function name |
CompanyOpen |
Codeunit |
40 |
CompanyOpen |
GetSystemIndicator |
Codeunit |
40 |
GetSystemIndicator |
CompanyClose |
Codeunit |
40 |
CompanyClose |
FindPrinter |
Codeunit |
44 |
GetPrinterName |
ApplicationVersion |
Codeunit |
9015 |
ApplicationVersion |
CustomApplicationVersion |
N/A |
N/A |
N/A |
ReleaseVersion |
Codeunit |
9015 |
ReleaseVersion |
ApplicationBuild |
Codeunit |
9015 |
ApplicationBuild |
CustomApplicationBuild |
N/A |
N/A |
N/A |
ApplicationLanguage |
Codeunit |
43 |
ApplicationLanguage |
DefaultRoleCenter |
Codeunit |
9170 |
DefaultRoleCenterID |
MakeDateTimeText |
Codeunit |
41 |
MakeDateTimeText |
GetSeparateDateTime |
Codeunit |
41 |
GetSeparateDateTime |
MakeDateText |
Codeunit |
41 |
MakeDateText |
MakeTimeText |
Codeunit |
41 |
MakeTimeText |
MakeText |
Codeunit |
41 |
MakeText |
MakeDateTimeFilter |
Codeunit |
41 |
MakeDateTimeFilter |
MakeDateFilter |
Codeunit |
41 |
MakeDateFilter |
MakeTextFilter |
Codeunit |
41 |
MakeTextFilter |
MakeCodeFilter |
Codeunit |
41 |
MakeTextFilter |
MakeTimeFilter |
Codeunit |
41 |
MakeTimeFilter |
AutoFormatTranslate |
Codeunit |
45 |
AutoFormatTranslate |
ReadRounding |
Codeunit |
45 |
ReadRounding |
CaptionClassTranslate |
Codeunit |
42 |
CaptionClassTranslate |
GetCueStyle |
Codeunit |
9701 |
GetCueStyle |
SetGlobalLanguage |
Codeunit |
43 |
SetGlobalLanguage |
ValidateApplicationlLanguage |
Codeunit |
43 |
ValidateApplicationLanguage |
LookupApplicationlLanguage |
Codeunit |
43 |
LookupApplicationLanguage |
GetGlobalTableTriggerMask |
Codeunit |
49 |
GetGlobalTableTriggerMask |
OnGlobalInsert |
Codeunit |
49 |
OnGlobalInsert |
OnGlobalModify |
Codeunit |
49 |
OnGlobalModify |
OnGlobalDelete |
Codeunit |
49 |
OnGlobalDelete |
OnGlobalRename |
Codeunit |
49 |
OnGlobalRename |
GetDatabaseTableTriggerSetup |
Codeunit |
49 |
GetDatabaseTableTriggerSetup |
OnDatabaseInsert |
Codeunit |
49 |
OnDatabaseInsert |
OnDatabaseModify |
Codeunit |
49 |
OnDatabaseModify |
OnDatabaseDelete |
Codeunit |
49 |
OnDatabaseDelete |
OnDatabaseRename |
Codeunit |
49 |
OnDatabaseRename |
OnDebuggerBreak |
Codeunit |
9500 |
ProcessOnDebuggerBreak |
LaunchDebugger |
Codeunit |
9500 |
OpenDebugger |
OpenSettings |
Codeunit |
9170 |
OpenSettings |
OpenContactMSSales |
Codeunit |
50 |
OpenContactMSSales |
InvokeExtensionInstallation |
Codeunit |
2501 |
InvokeExtensionInstallation |
CustomizeChart |
Codeunit |
9180 |
CustomizeChart |
HasCustomLayout |
Codeunit |
44 |
HasCustomLayout |
MergeDocument |
Codeunit |
44 |
MergeDocument |
ReportGetCustomRdlc |
Codeunit |
44 |
ReportGetCustomRdlc |
ReportScheduler |
Codeunit |
44 |
ScheduleReport |
OnBeforeOpenSettings |
Codeunit |
9170 |
OnBeforeOpenSettings |
OnAfterGetApplicationVersion |
Codeunit |
9015 |
OnAfterGetApplicationVersion |
OnBeforeCompanyOpen |
Codeunit |
40 |
OnBeforeCompanyOpen |
OnAfterCompanyOpen |
Codeunit |
40 |
OnAfterCompanyOpen |
OnRoleCenterOpen |
Codeunit |
9170 |
OnRoleCenterOpen |
OnBeforeCompanyClose |
Codeunit |
40 |
OnBeforeCompanyClose |
OnAfterCompanyClose |
Codeunit |
40 |
OnAfterCompanyClose |
OnAfterGetSystemIndicator |
Table |
79 |
OnAfterGetSystemIndicator |
OnAfterFindPrinter |
Codeunit |
44 |
OnAfterGetPrinterName |
OnAfterGetDefaultRoleCenter |
Codeunit |
9170 |
OnAfterGetDefaultRoleCenter |
OnAfterMakeDateText |
N/A |
N/A |
N/A |
OnAfterMakeTimeText |
N/A |
N/A |
N/A |
OnAfterMakeText |
N/A |
N/A |
N/A |
OnAfterMakeDateTimeFilter |
Codeunit |
41 |
OnAfterMakeDateTimeFilter |
OnAfterMakeDateFilter |
Codeunit |
41 |
OnAfterMakeDateFilter |
OnAfterMakeTextFilter |
Codeunit |
41 |
OnAfterMakeTextFilter |
OnAfterMakeCodeFilter |
N/A |
N/A |
N/A |
OnAfterMakeTimeFilter |
Codeunit |
41 |
OnAfterMakeTimeFilter |
OnAfterAutoFormatTranslate |
Codeunit |
45 |
OnAfterAutoFormatTranslate |
OnAfterCaptionClassTranslate |
Codeunit |
42 |
OnAfterCaptionClassTranslate |
OnAfterGetGlobalTableTriggerMask |
Codeunit |
49 |
OnAfterGetGlobalTableTriggerMask |
OnAfterOnGlobalInsert |
Codeunit |
49 |
OnAfterOnGlobalInsert |
OnAfterOnGlobalModify |
Codeunit |
49 |
OnAfterOnGlobalModify |
OnAfterOnGlobalDelete |
Codeunit |
49 |
OnAfterOnGlobalDelete |
OnAfterOnGlobalRename |
Codeunit |
49 |
OnAfterOnGlobalRename |
OnAfterGetDatabaseTableTriggerSetup |
Codeunit |
49 |
OnAfterGetDatabaseTableTriggerSetup |
OnAfterOnDatabaseInsert |
Codeunit |
49 |
OnAfterOnDatabaseInsert |
OnAfterOnDatabaseModify |
Codeunit |
49 |
OnAfterOnDatabaseModify |
OnAfterOnDatabaseDelete |
Codeunit |
49 |
OnAfterOnDatabaseDelete |
OnAfterOnDatabaseRename |
Codeunit |
49 |
OnAfterOnDatabaseRename |
OnAfterHasCustomLayout |
Codeunit |
44 |
OnAfterHasCustomLayout |
OnAfterReportGetCustomRdlc |
Table |
9650 |
OnAfterReportGetCustomRdlc |
OnBeforeOnDatabaseInsert |
Codeunit |
49 |
OnBeforeOnDatabaseInsert |
OnBeforeOnDatabaseModify |
Codeunit |
49 |
OnBeforeOnDatabaseModify |
OnBeforeOnDatabaseDelete |
Codeunit |
49 |
OnBeforeOnDatabaseDelete |
OnBeforeOnDatabaseRename |
Codeunit |
49 |
OnBeforeOnDatabaseRename |
OnEditInExcel |
Codeunit |
6710 |
OnEditInExcel |
OnInstallAppPerDatabase |
N/A |
N/A |
N/A |
OnInstallAppPerCompany |
N/A |
N/A |
N/A |
OnCheckPreconditionsPerDatabase |
Codeunit |
9900 |
OnCheckPreconditionsPerDatabase |
OnCheckPreconditionsPerCompany |
Codeunit |
9900 |
RaiseOnCheckPreconditionsPerCompany |
OnUpgradePerDatabase |
Codeunit |
9900 |
OnUpgradePerDatabase |
OnUpgradePerCompany |
Codeunit |
9900 |
OnUpgradePerCompany |
OnValidateUpgradePerDatabase |
Codeunit |
9900 |
OnValidateUpgradePerDatabase |
OnValidateUpgradePerCompany |
Codeunit |
9900 |
OnValidateUpgradePerCompany |
Stay Tuned for more….


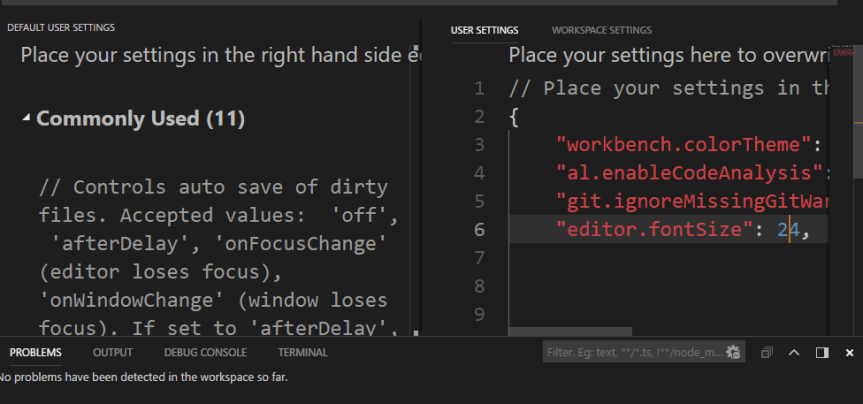
 These changes get saved in


 Stay tuned for many more features….